
2 person desk. 7’9″‘ long by 30″ deep. Live edge Cedar plank. 2 desktop computer cases built into base cabinet.
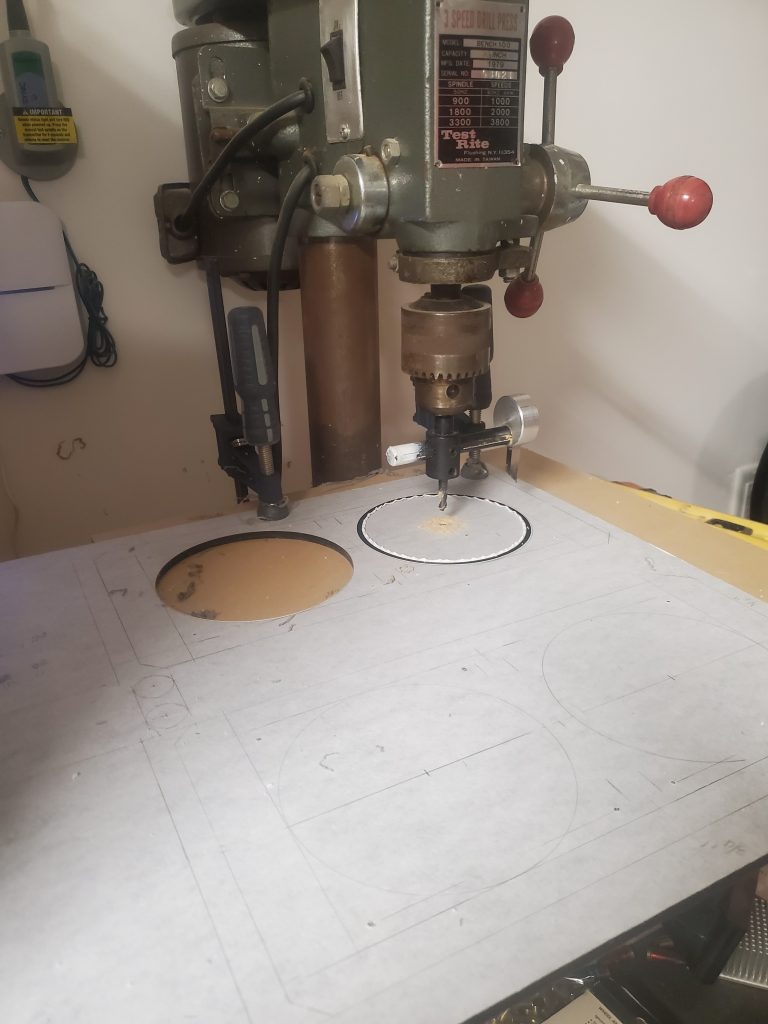
All holes are hand drawn onto the protective film covering the Acrylic sheet 
This type of circle cutter is perfect for precise and custom sizes. Cutting blade is easily sharpened. Can only be used with drill press. 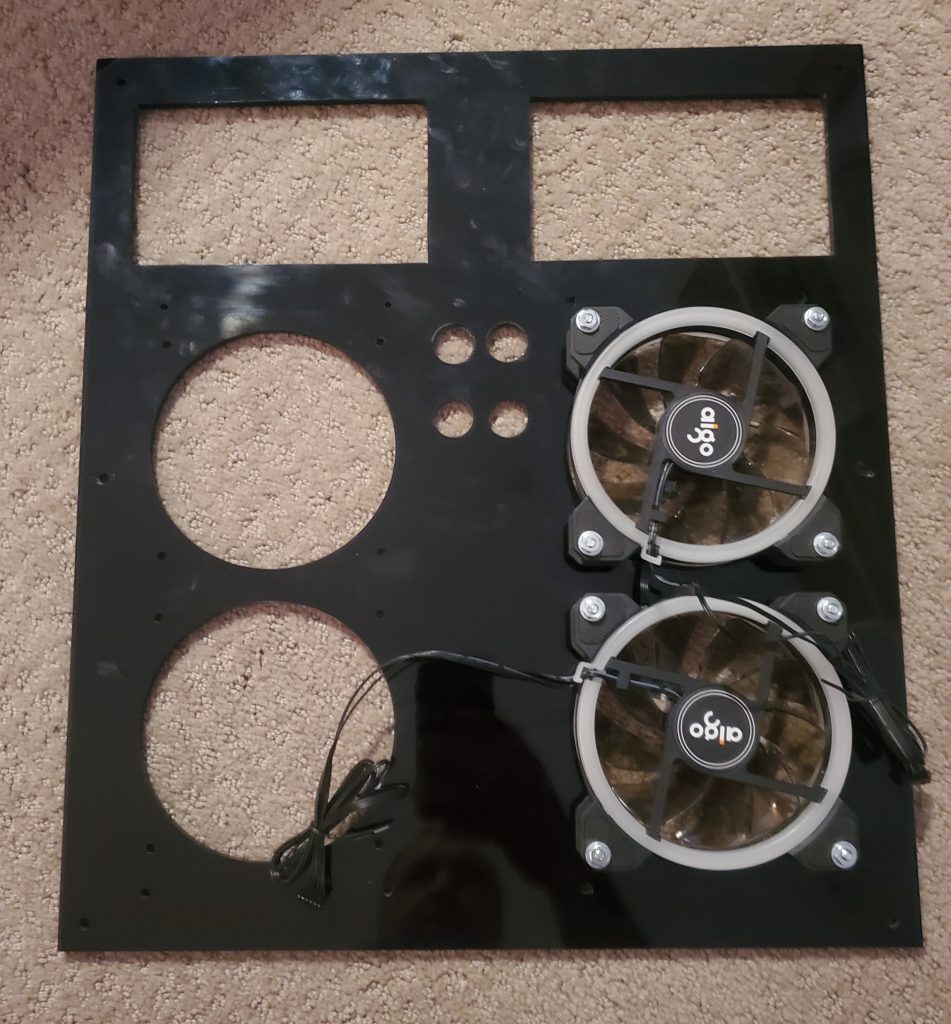
One side of acrylic is shiny & reflective. This side is prone to fingerprints so it faces inward. 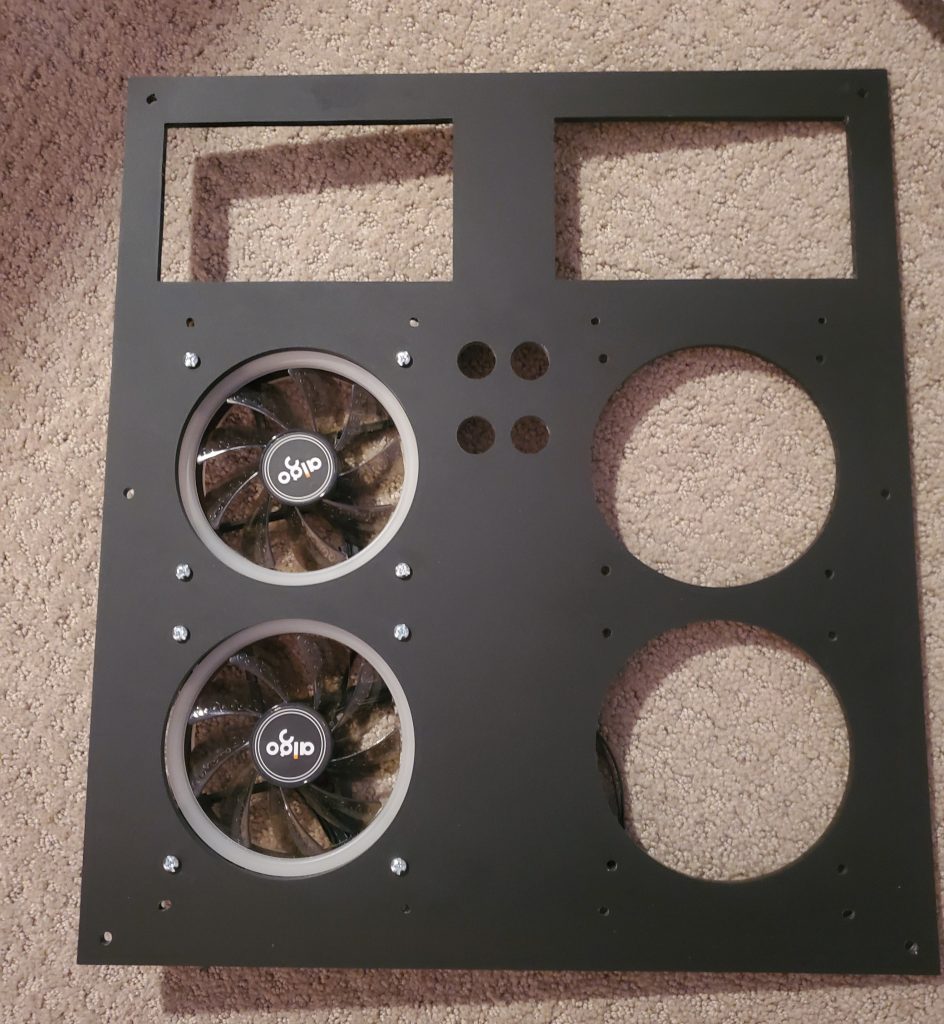
This side has a durable matte finish. No fingerprints. No scratches. Intake fans mounted on one side. Top holes in center are for power button. Bottom hole is a wired lock to disable power switch. 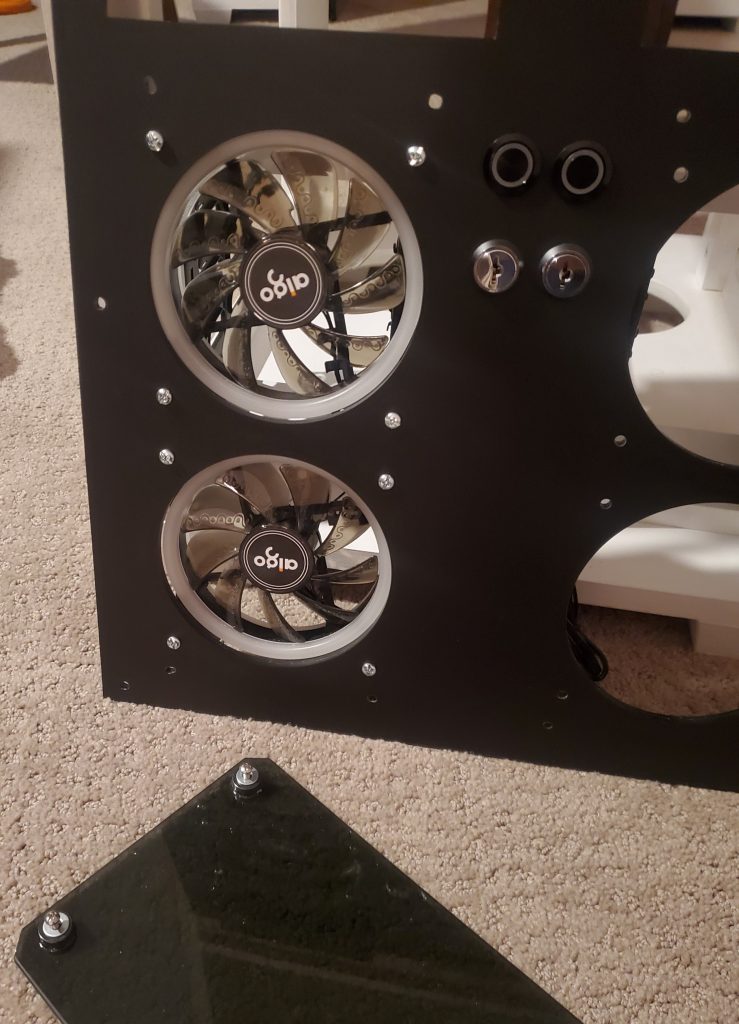
The silver cylinder locks located in center, under the power button, are two-position (open circuit/ closed circuit) switch locks. They are wired in-line with the power button. The key can be inserted and removed in either position. Since kids are good at getting on computer when they shouldn’t, a simple turn of the lock disables the power button and they can’t turn it on. 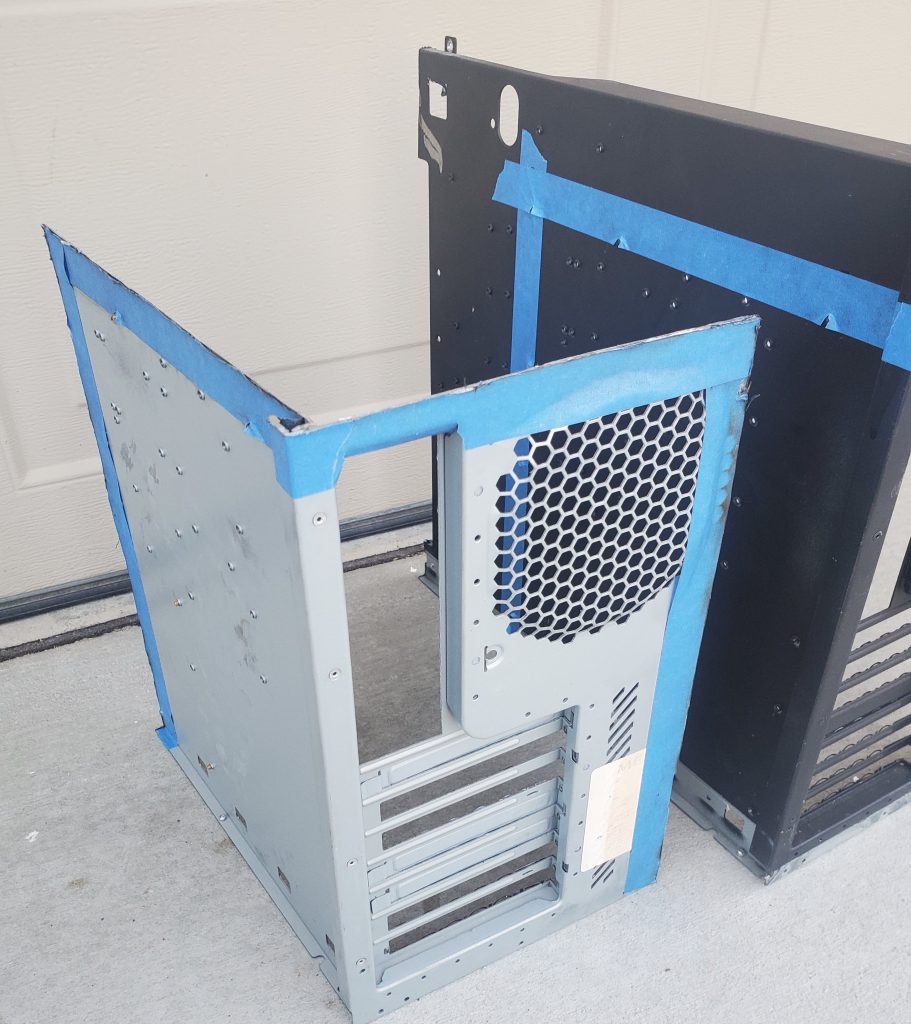
These are two identical cases that were harvested from a recycler. Pencil line was drawn on the painters tape and I used a metal cutoff wheel to cut to size, retaining only the motherboard and rear panel. 
Both cases after cut to final size. 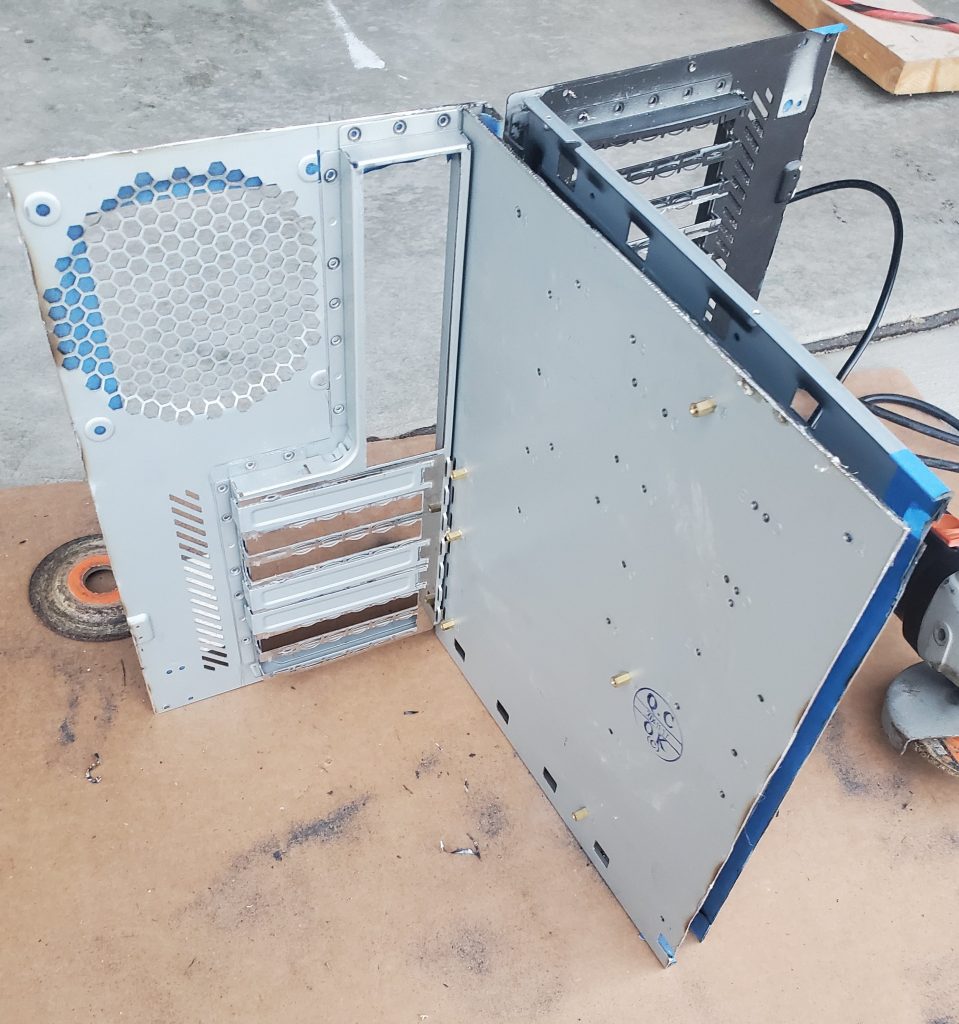
Edges were softened with a flat hand file. Cases were then spray painted black. 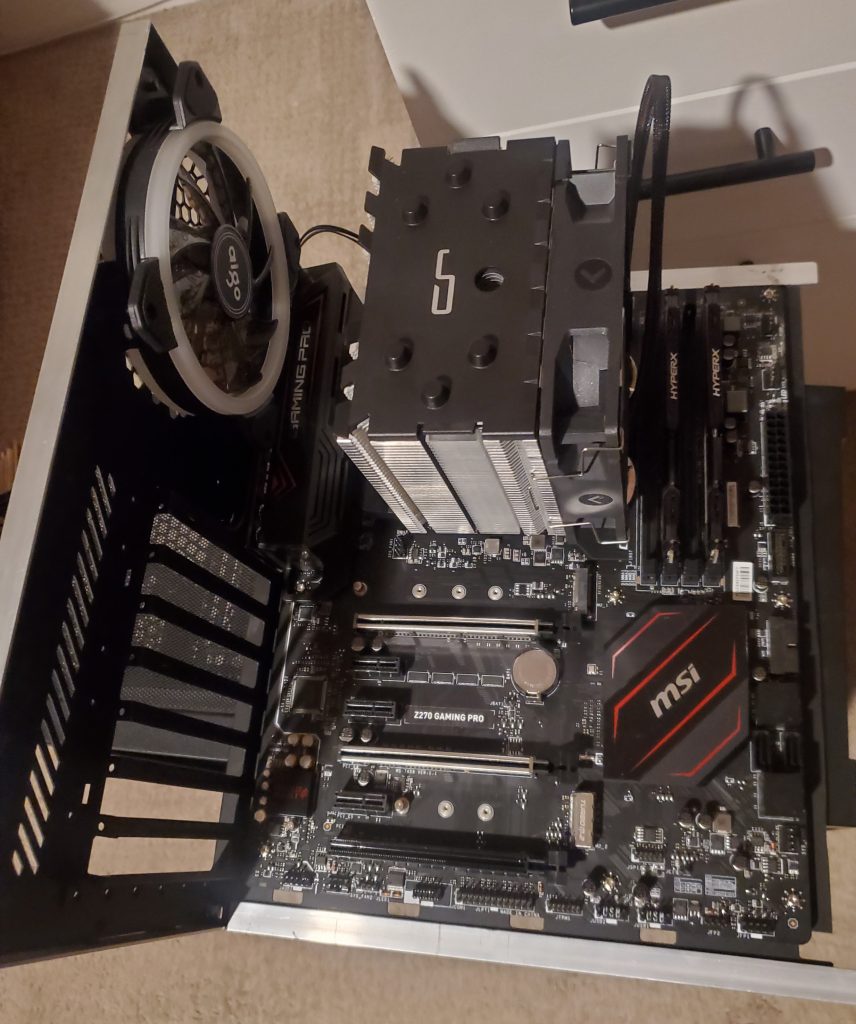
Angled aluminum was glued around frame edges with J-B Weld. Motherboard installed onto the tray. 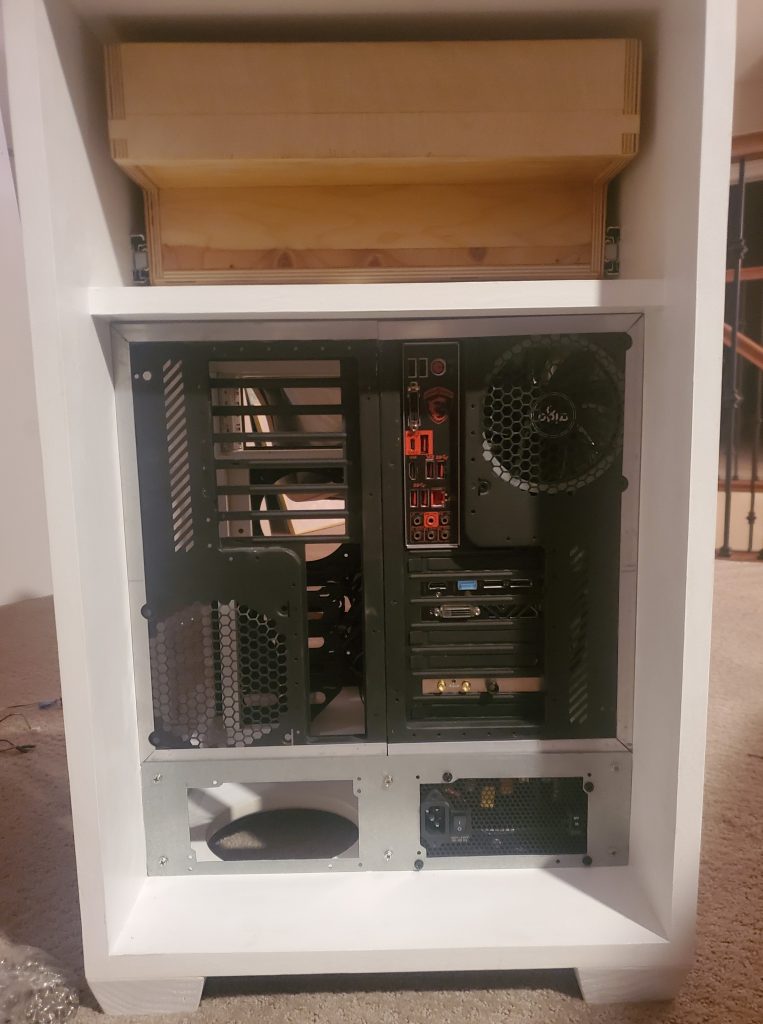
View from back of computer cabinet at final fitting, prior to final adjustments and touch-ups. Cabinet is deliberately deeper than needed for computer. That extra depth is for some concealment and management of cables. There’s even room for a power strip to be attached to that inside edge.
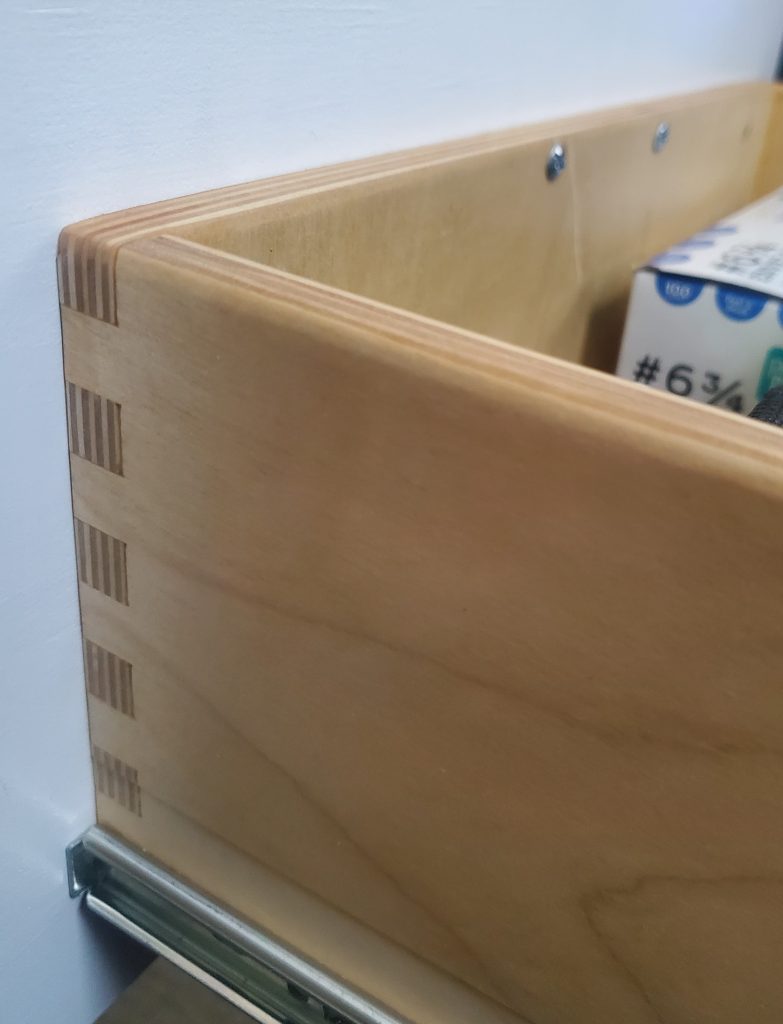
The largest drawers were made with box-joints. Mostly just for appearance. 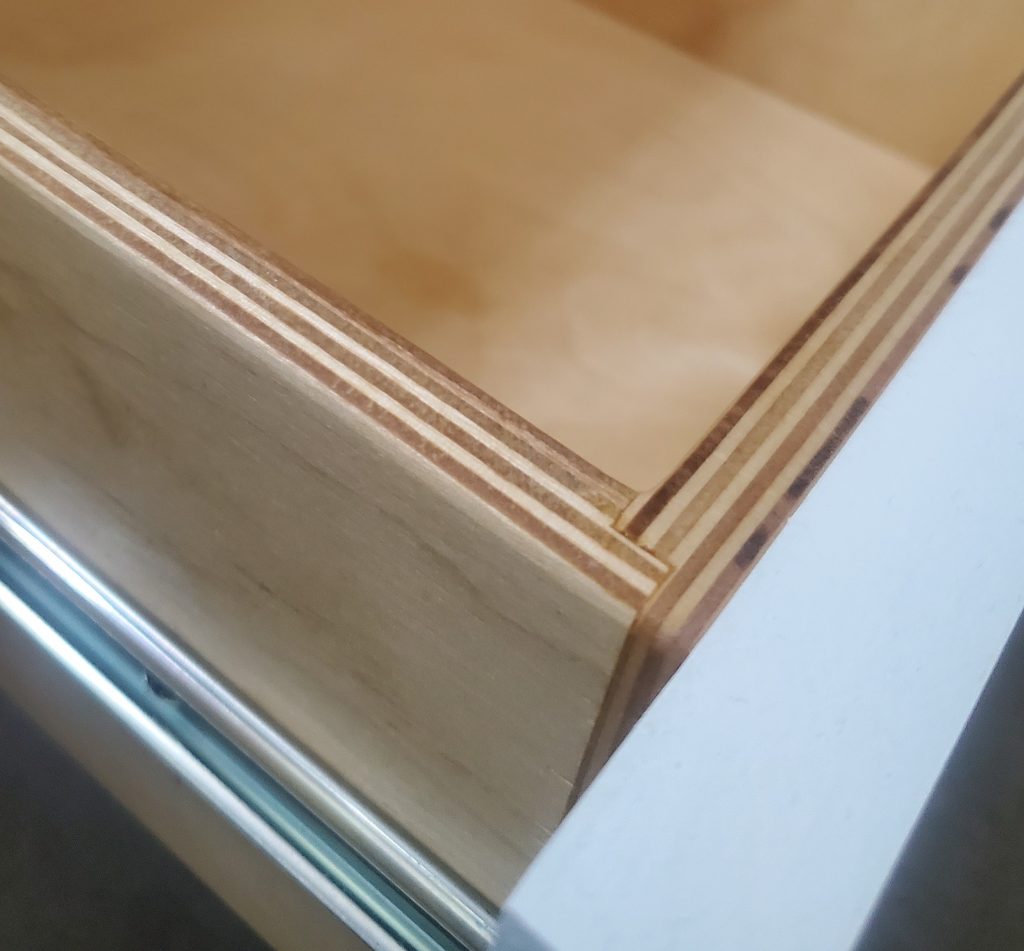
Smaller drawers were made using a simple rabbeted joint. This adds some more gluing face and strength but the biggest advantage is how easy they are to clamp in a way that is also self-aligning and stays square during glue-up. 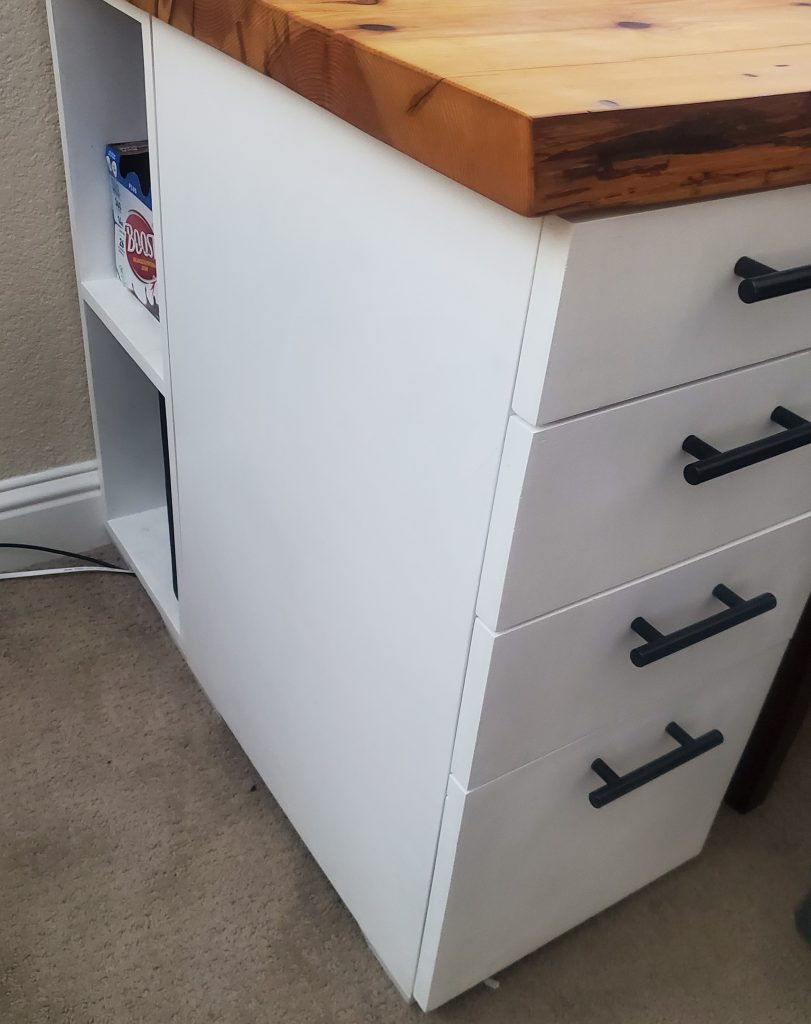
The front drawers were built as separate cabinets from the shelves seen in back. If I ever needed to use these drawers under a standard depth desk I could do so without that extra depth. 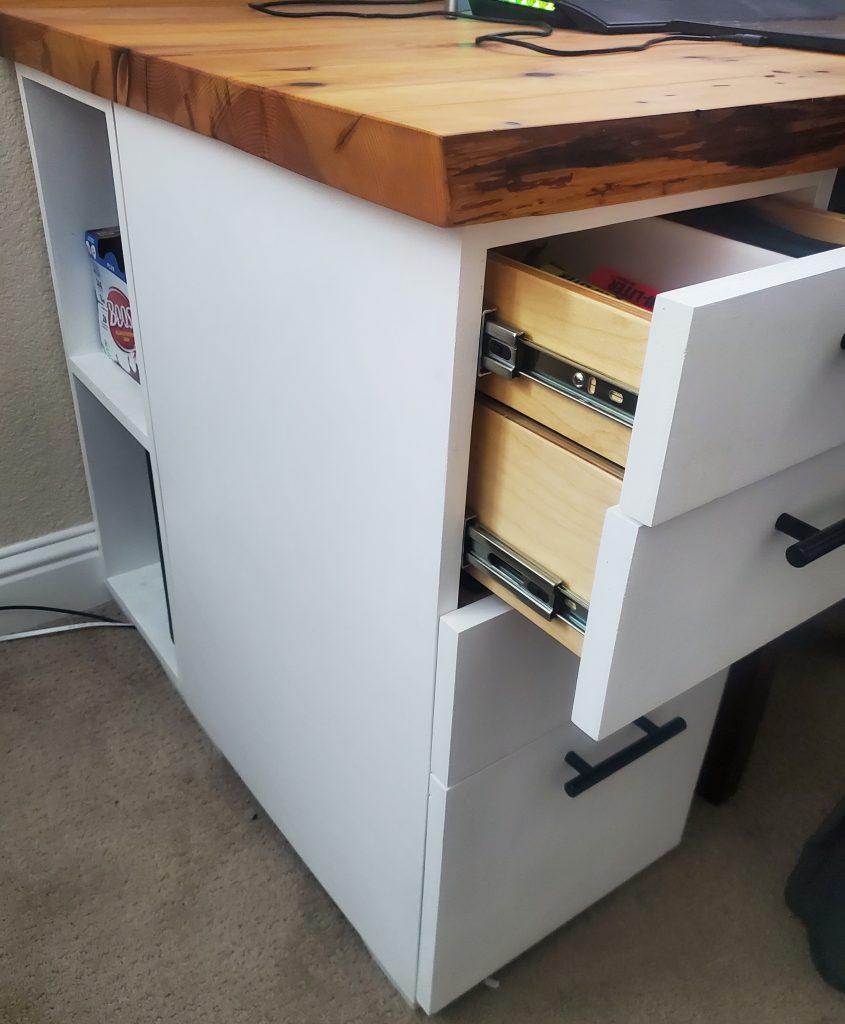
A view of the clean live-edge in front and also some epoxy in the cracks and knots. I’ve found that when making drawer boxes intended to last a “life-time” it’s important to use quality drawer slides. They cost a few dollars more per drawer but 10 years from now when they are still working like new it will feel like money well spent. 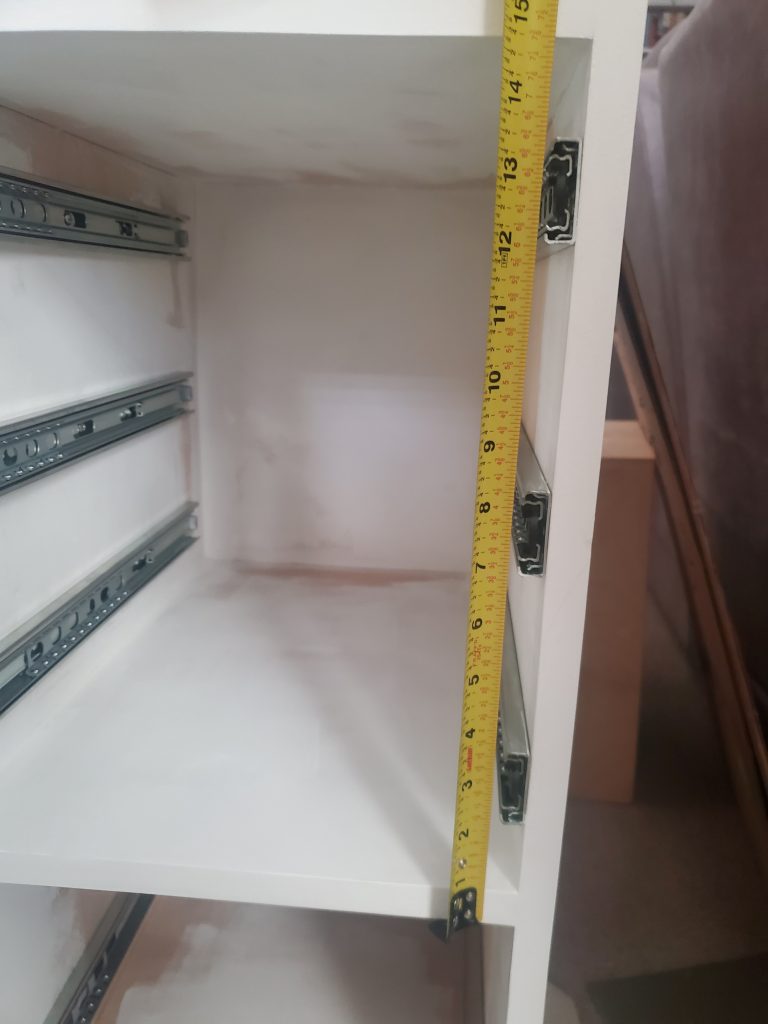
These cabinets would be probably be fine without the horizontal support since quality cabinet-grade plywood was used but having that one support above the larger bottom drawer guarantees that the sides will never bow out even if kids choose to sit on the desk. The bottom drawer is sized just large enough to accept hanging files and can serve as a file-cabinet drawer if needed.
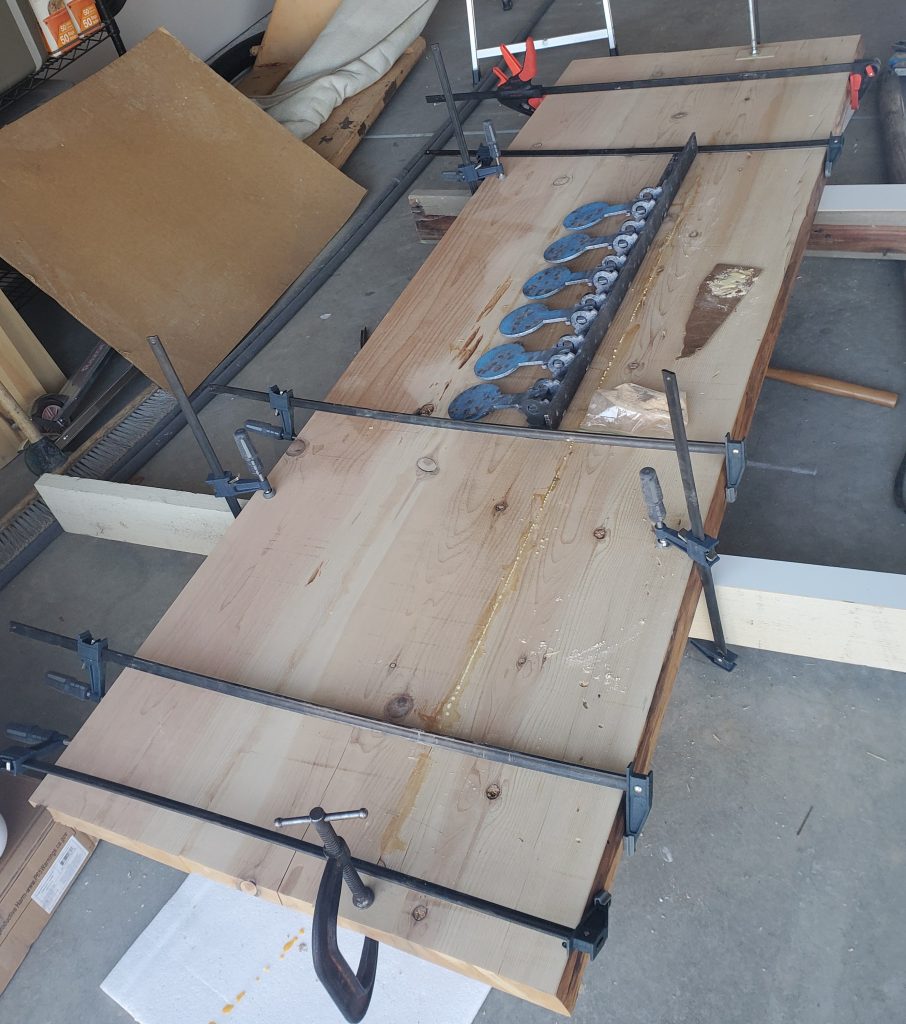
Desk top was made from 3 slabs of harvested Cedar. They were first cleaned up through a thickness planer. Dowels were used between each joint to help maintain alignment during glue-up. The straightest and cleanest live edge was saved for the front. 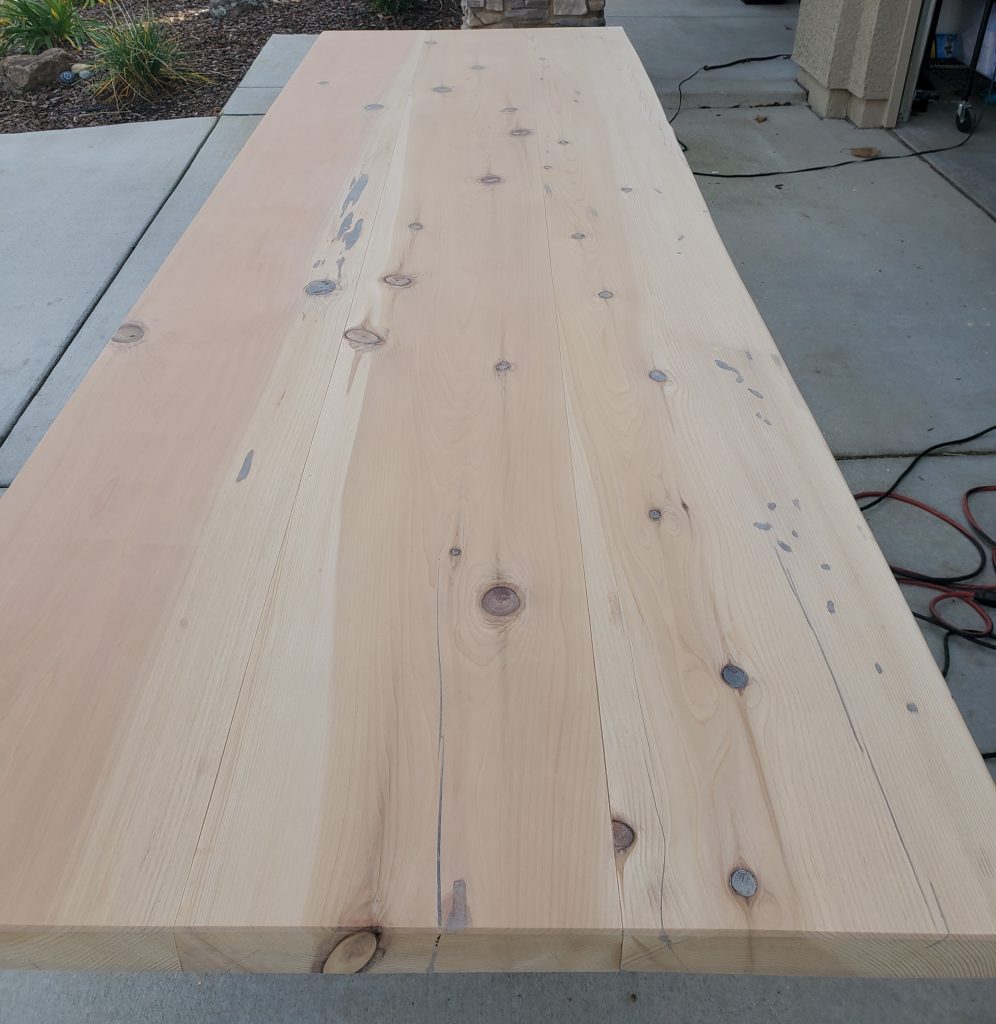
A clear epoxy was mixed with small amounts of charcoal grey and red tints. Epoxy was poured into all defects, knots, and cracks for the purpose of leaving a flat smooth writing surface. 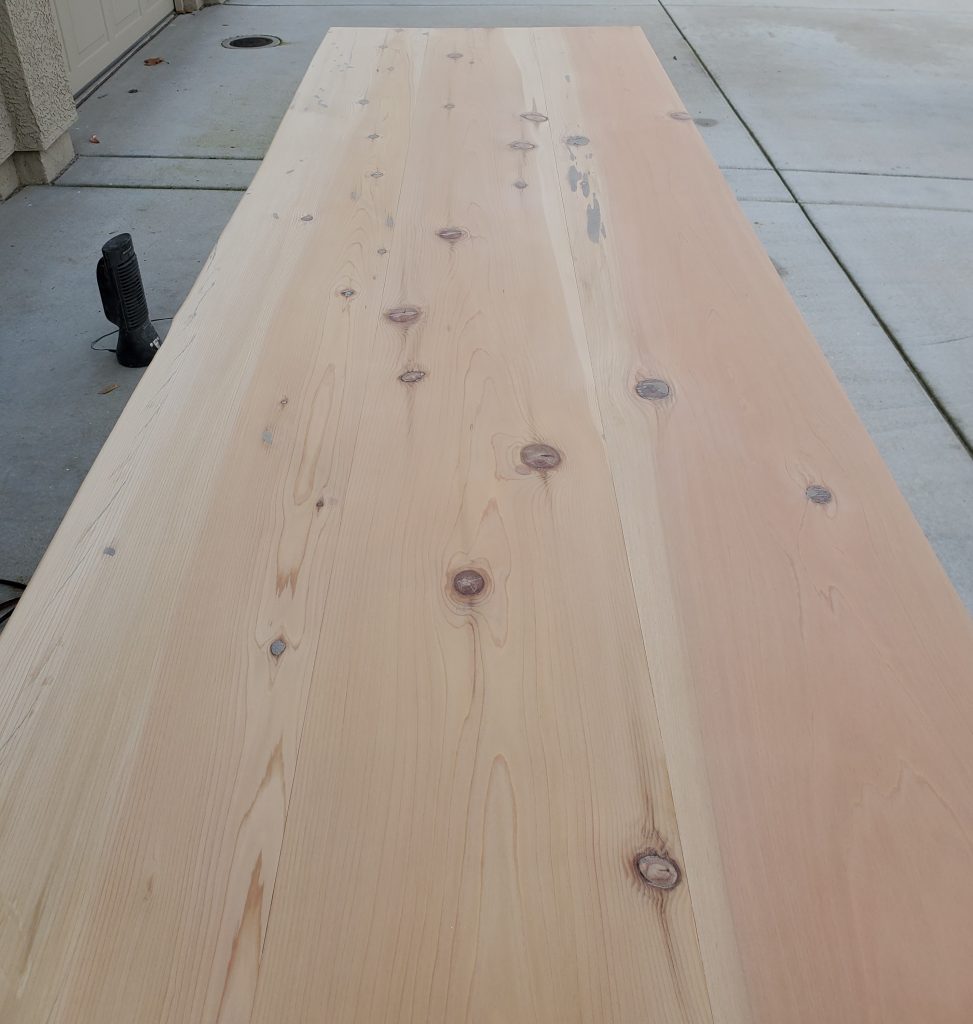
The three different slabs were trimmed and oriented in a manner that allowed for the most grain and color matching possible at each joint line.